> ## Documentation Index
> Fetch the complete documentation index at: https://dripart-docs-custom-nodes-sdk-v2-frontend.mintlify.site/llms.txt
> Use this file to discover all available pages before exploring further.
# Luma 이미지 → 비디오 파트너 노드
> Luma 이미지 → 비디오 파트너 노드 워크플로: ComfyUI에서 정적 이미지를 비디오로 변환하며, 필수 크레딧과 노드 파라미터를 포함합니다.
Luma 이미지 → 비디오 노드를 사용하면 Luma AI의 고급 기술을 통해 정적 이미지를 부드럽고 역동적인 비디오로 변환하여 이미지에 생동감과 움직임을 더할 수 있습니다.
## Luma 이미지 → 비디오의 장점
* **이미지 애니메이션**: 정적 이미지를 부드럽고 역동적인 비디오로 변환하여 이미지에 생명과 움직임을 불어넣습니다.
* **프롬프트 기반 모션**: 텍스트 프롬프트가 비디오의 모션 효과를 결정합니다.
* **카메라 제어**: Luma 컨셉 기능이 카메라 움직임을 제어하여 전문적인 촬영을 지원합니다.
* **유연한 이미지 입력**: `first_image`, `last_image` 또는 둘 다에서 작동합니다.
* **조정 가능한 출력**: 비디오 해상도와 재생 시간을 조정할 수 있으며, 모델 파라미터를 통해 다양한 비디오 생성 모델을 선택할 수 있습니다.
파트너 노드를 사용하려면 올바르게 로그인되어 있고 허가된 네트워크 환경을 사용하고 있는지 확인해야 합니다. 파트너 노드를 사용하기 위한 구체적인 요구사항은 문서의 [파트너 노드 개요](/ko/tutorials/partner-nodes/overview) 섹션을 참조해 주세요.
ComfyUI가 최신 버전으로 업데이트되었는지 확인하세요.
* [ComfyUI 다운로드](https://www.comfy.org/download)
* [업데이트 가이드](/ko/installation/update_comfyui)
이 가이드의 워크플로는 [워크플로 템플릿](/ko/interface/features/template)에서 확인할 수 있습니다.
템플릿에서 찾을 수 없다면, 귀하의 ComfyUI가 오래된 버전일 수 있습니다.
워크플로를 로드할 때 노드가 누락되는 경우, 가능한 원인:
1. 최신 ComfyUI 버전(최신 테스트 버전(nightly))을 사용하고 있지 않음
2. 일부 노드가 시작 시 가져오기에 실패함
* [클라우드](https://cloud.comfy.org)는 ComfyUI 안정판 출시 후 업데이트됩니다.
따라서 이 문서에서 핵심 노드가 누락된 것을 발견했다면, 그 이유는 새로운 핵심 노드가 아직 최신 안정판에 공개되지 않았기 때문일 수 있습니다. 다음 안정판 출시를 기다려 주세요.
## Luma 파트너 노드를 이용한 이미지에서 비디오 워크플로우
Luma Image to Video 노드는 비디오의 모션 효과를 결정하는 텍스트 프롬프트와 함께 하나 이상의 이미지 입력(`first_image` 또는 `last_image`)이 필요합니다. 이 가이드에서는 `first_image`와 `luma_concepts`를 사용한 예제를 만들어 Luma AI의 비디오 생성 기능을 소개합니다.
### 1. 워크플로우 다운로드하기
워크플로 정보는 아래 비디오의 메타데이터에 포함되어 있습니다. 비디오를 다운로드하여 ComfyUI로 드래그하면 워크플로가 로드됩니다.

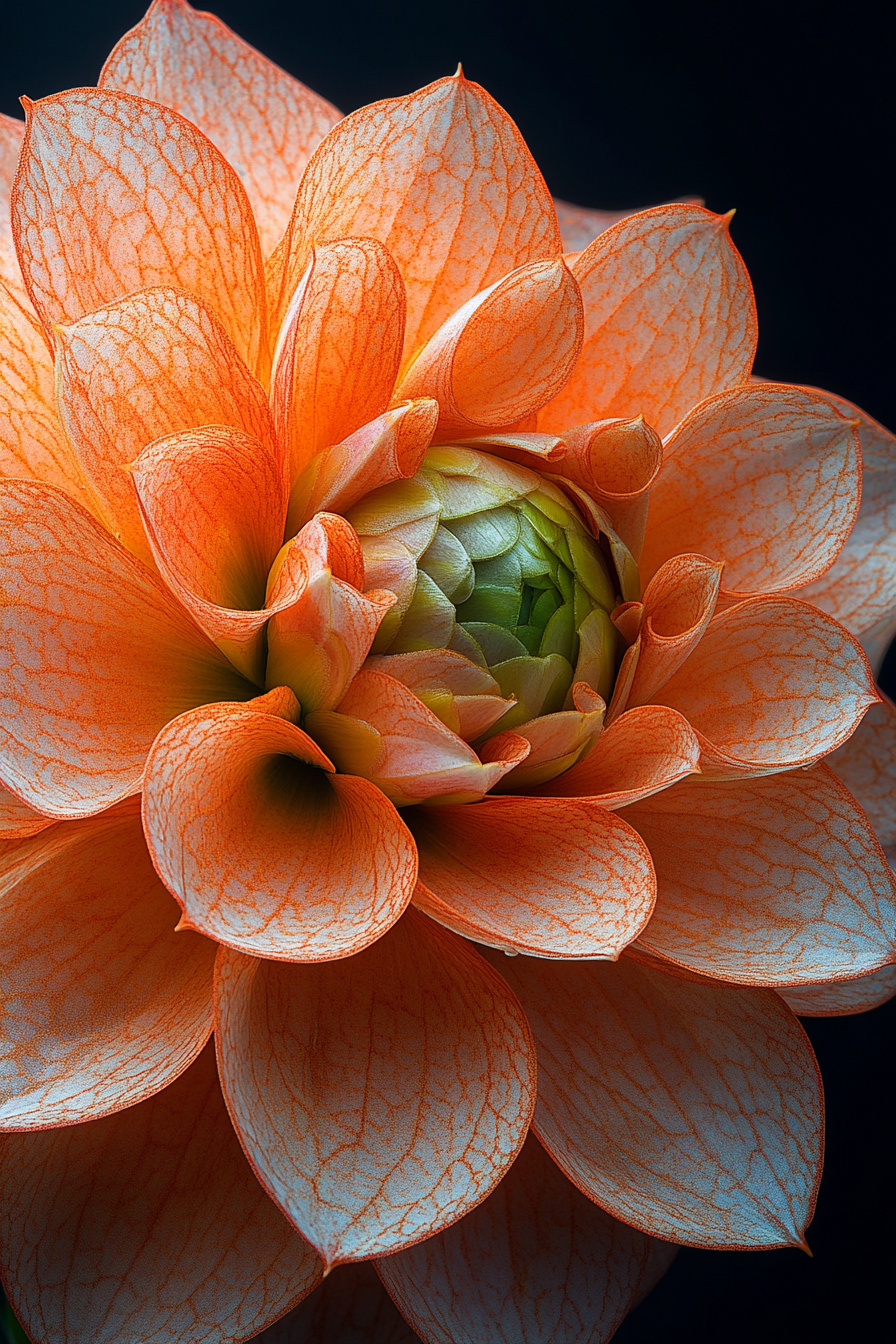
입력으로 사용할 다음 이미지를 다운로드하세요:
### 2. 워크플로우 단계 따라하기
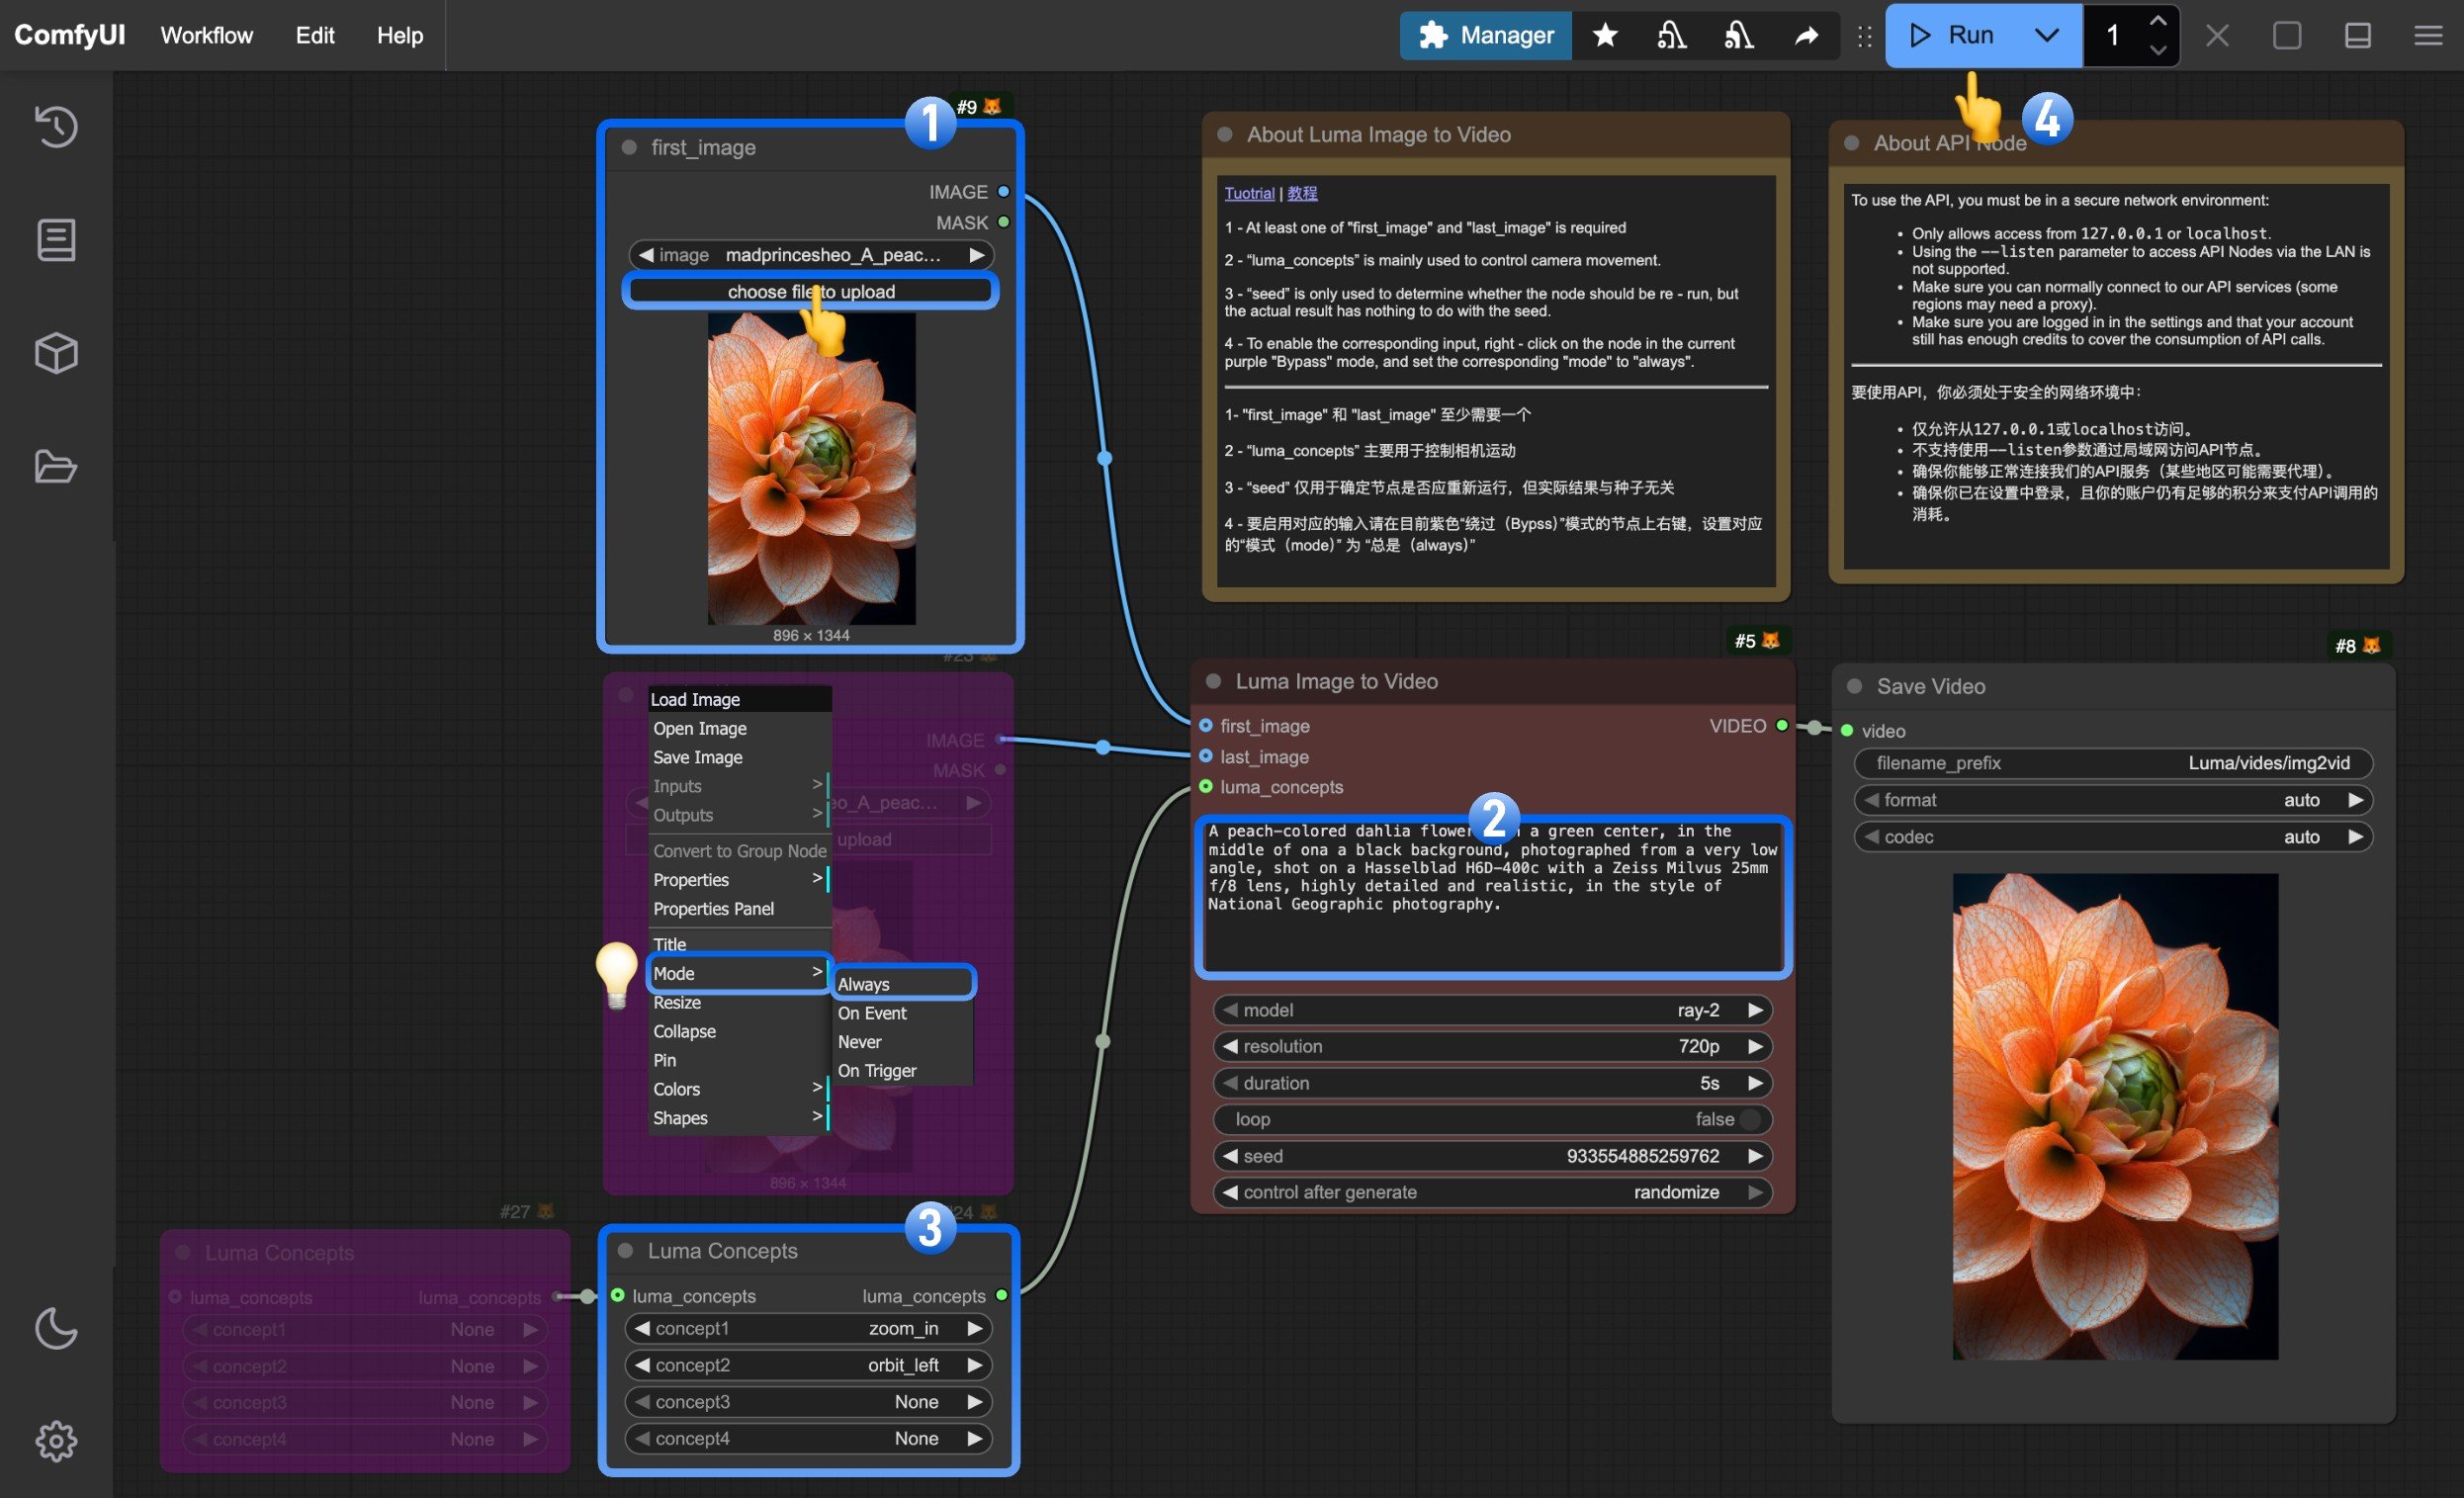 다음 기본 단계에 따라 워크플로를 실행하세요:
1. Upload your input image in the `first_image` node
2. (Optional) Write prompts in the Luma Image to Video node to describe how you want the image animated
3. (Optional) Modify the `Luma Concepts` node to control camera movement for professional cinematography
4. Click `Run` or use `Ctrl(cmd) + Enter` to generate the video
5. Once the API returns results, view the generated video in the `Save Video` node. The video will also be saved to the `ComfyUI/output/` directory
### 3. 추가 참고사항
* **Image Input Requirements**: At least one of `first_image` or `last_image` is required, with a maximum of 1 image per input
* **Luma Concepts**: Controls camera movement for professional video effects
* **Seed Parameter**: Only determines if the node should rerun, doesn't affect generation results
* **Enable Input Nodes**: Right-click on purple "Bypass" mode nodes and set "mode" to "always" to enable inputs
* **Model Selection**: Different video generation models have unique characteristics, adjustable via the model parameter
* **Resolution and Duration**: Adjust output video resolution and length using resolution and duration parameters
다음 기본 단계에 따라 워크플로를 실행하세요:
1. Upload your input image in the `first_image` node
2. (Optional) Write prompts in the Luma Image to Video node to describe how you want the image animated
3. (Optional) Modify the `Luma Concepts` node to control camera movement for professional cinematography
4. Click `Run` or use `Ctrl(cmd) + Enter` to generate the video
5. Once the API returns results, view the generated video in the `Save Video` node. The video will also be saved to the `ComfyUI/output/` directory
### 3. 추가 참고사항
* **Image Input Requirements**: At least one of `first_image` or `last_image` is required, with a maximum of 1 image per input
* **Luma Concepts**: Controls camera movement for professional video effects
* **Seed Parameter**: Only determines if the node should rerun, doesn't affect generation results
* **Enable Input Nodes**: Right-click on purple "Bypass" mode nodes and set "mode" to "always" to enable inputs
* **Model Selection**: Different video generation models have unique characteristics, adjustable via the model parameter
* **Resolution and Duration**: Adjust output video resolution and length using resolution and duration parameters